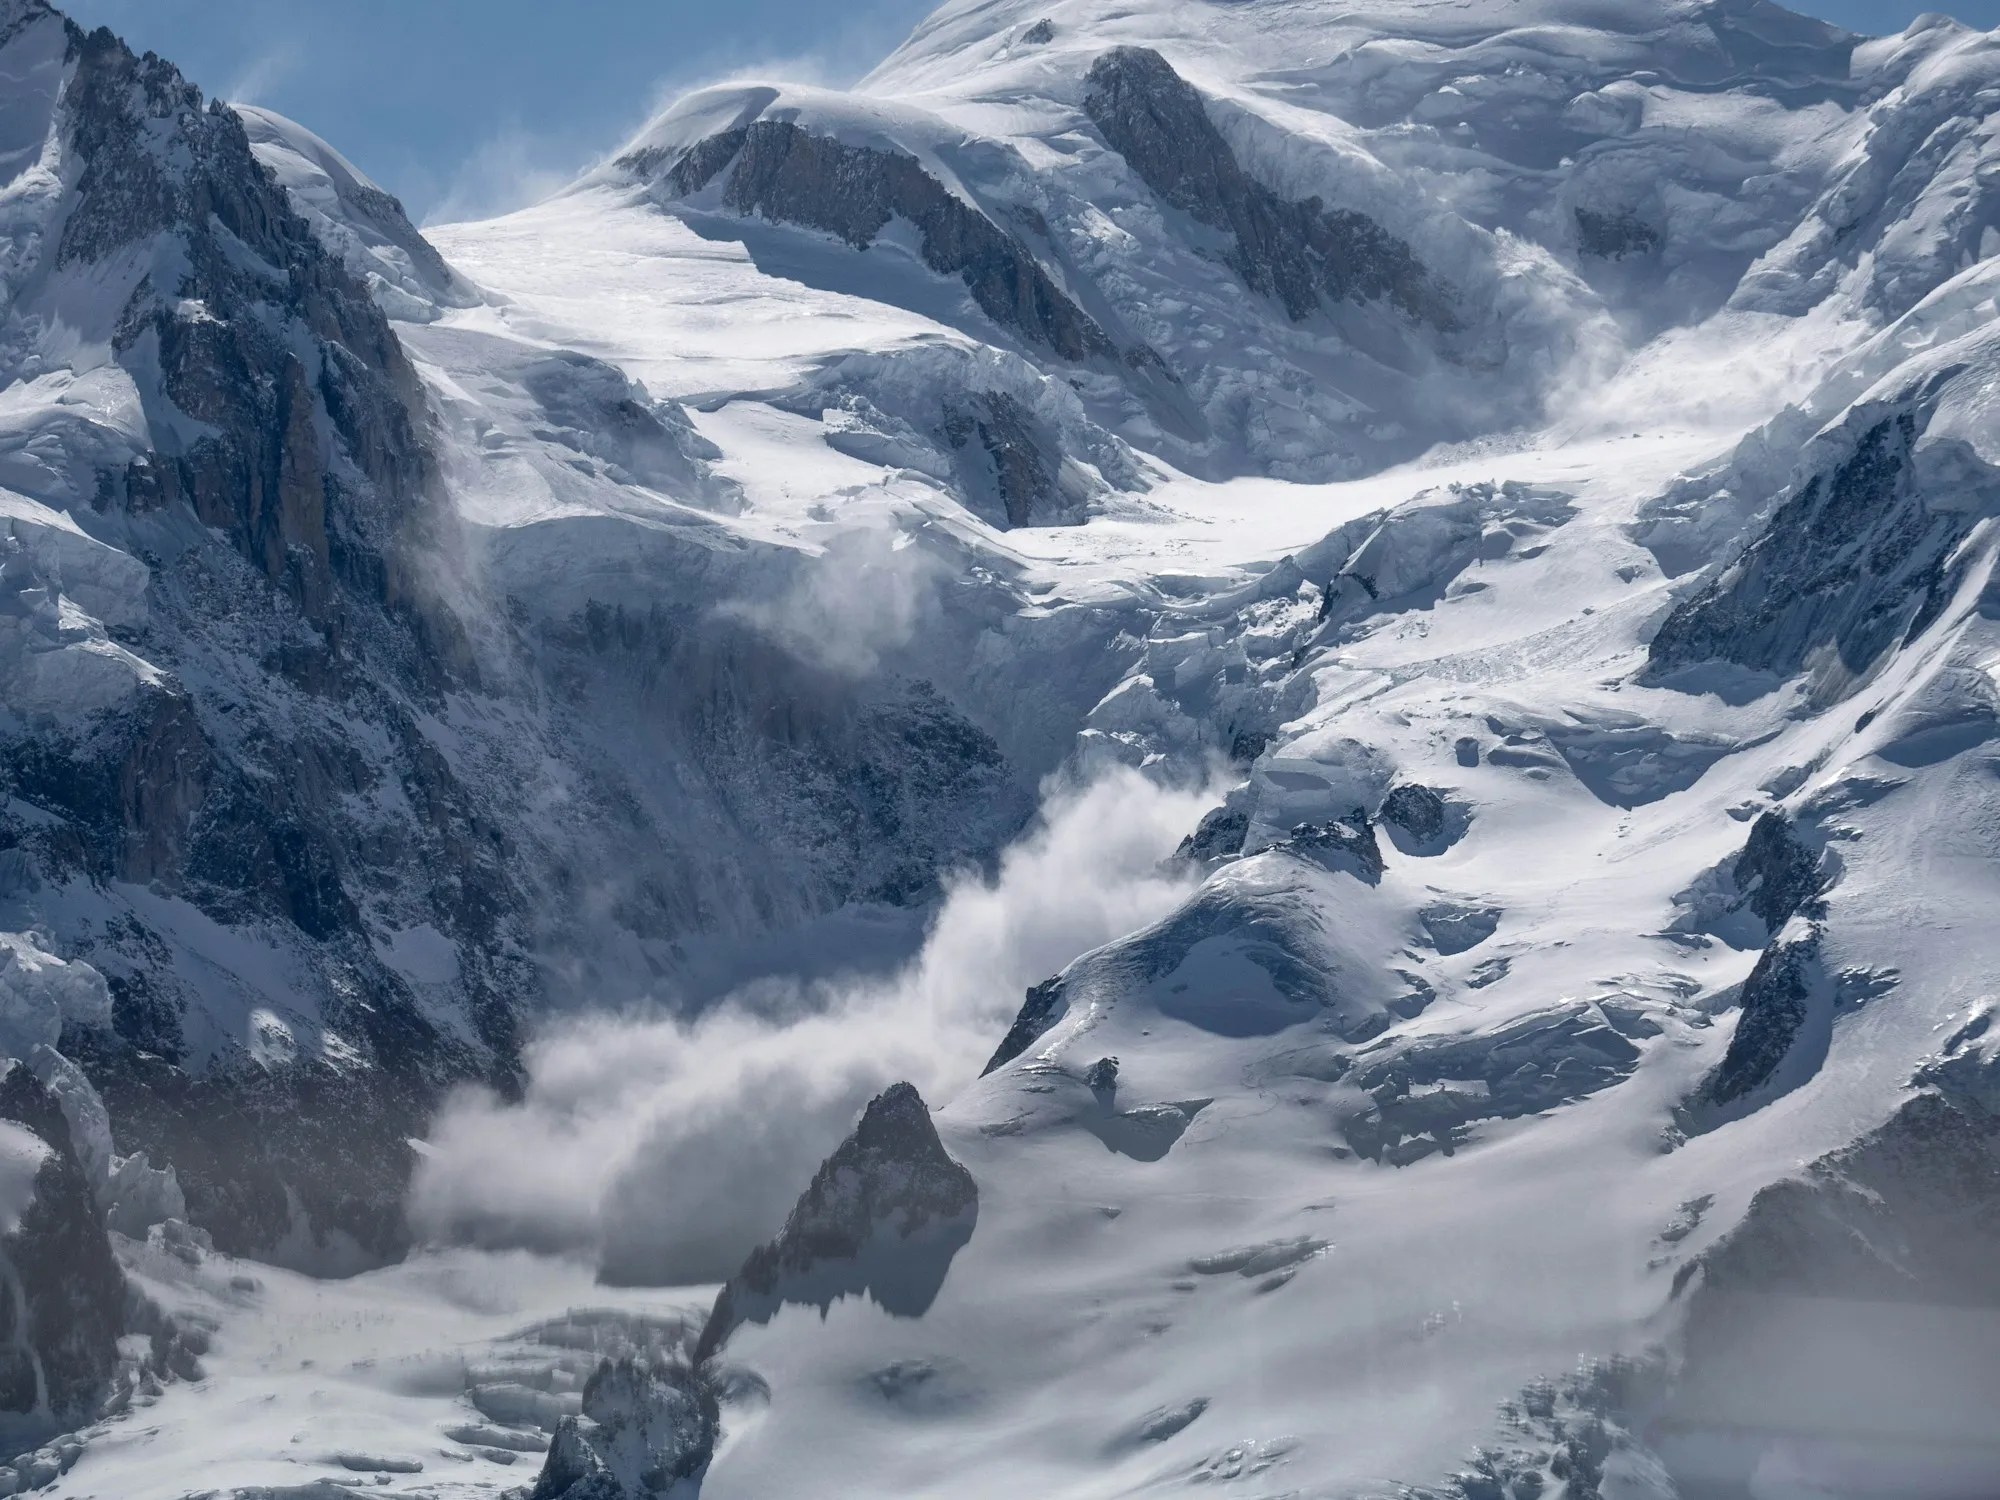
Over the last 10 winters, an average of 27 people died in avalanches each winter in the United States (CAIC). Most fatal accidents involve a slab avalanche, where a cohesive layer of snow breaks free along a fracture line and slides as a unit. Large or fast avalanches can reach speeds approaching 100 mph (Avalanche.org), which is part of why escape on foot or on skis is rarely possible once a slab releases above you.
Read this as background, not preparation. What keeps people alive in avalanche terrain is real field training (AIARE Level 1 or equivalent), rescue practice with the partners you travel with, and the current regional avalanche forecast. Nothing here replaces them.
Roughly 90% of avalanche accidents that hurt people are triggered by the victim or someone in the victim’s party (Avalanche.org). The most important safety decision is usually made before any rescue: whether the group chooses to enter, cross, or stop below avalanche terrain under the day’s conditions.
That pattern shapes the rest of this guide. Because most accident avalanches are triggered by the people involved in them, avalanche safety is mostly a discipline of decisions: reading the forecast before going out, carrying the right equipment and knowing how to use it, and choosing terrain that matches what the day allows. The guide follows the framework the US Forest Service National Avalanche Center uses for recreational avalanche education: get the forecast, get the gear, get the training. None of the three alone is sufficient; together they are the floor of responsible backcountry travel. Avalanche.org, the source behind much of this guide, is a partnership between the US Forest Service National Avalanche Center and the American Avalanche Association.
Who is at risk
Avalanches are a hazard for anyone who travels in or below steep, snow-covered terrain, not just expert backcountry skiers. The US avalanche centers track accidents across a wide range of activities: backcountry and lift-accessed skiers and snowboarders, snowmobilers and other motorized users, snowshoers and hikers, climbers and mountaineers, and the hybrid tourers who climb under motor power and descend on skis. People are also caught while hunting, while driving highways that cross avalanche terrain, and occasionally inside buildings built in known paths. If your day takes you onto a slope steeper than about 30 degrees, or underneath one, the forecast and the gear apply to you. The common thread in accidents is not the activity; it is exposure to avalanche terrain when the snowpack can be triggered.
Before you leave the trailhead
Most of avalanche safety happens before you reach the slope. This checklist collects the day’s preparation into the order it tends to happen (NAC, Avalanche.org):
- Read the full forecast for the appropriate region, not just the headline danger rating.
- Identify the day’s avalanche problems, the aspects and elevations they affect, and whether the danger is rising or falling.
- Choose your terrain before you leave, including the slopes you will not enter and the points where you will turn around.
- Perform a transceiver check: every unit on, battery level adequate, each one transmitting, and each one confirmed searchable by the group.
- Confirm everyone carries a probe, a shovel, an airbag pack if you use one, a communication device, first aid, and extra layers.
- Agree out loud that anyone in the group can call for a more conservative route or turn the group around.
What an avalanche is
An avalanche is a mass of snow moving down a slope. For recreational decision-making, the two most important release styles are loose-snow and slab, though many other avalanche types and problems exist, including wet loose, storm slab, wind slab, wet slab, persistent and deep persistent slab, glide, and cornice fall. The two below behave differently and present different levels of risk.
Loose-snow avalanches, sometimes called sluffs, start at a single point in the surface layer and fan out as they descend. They typically involve smaller volumes of snow and are responsible for a smaller share of fatalities, though they can still bury or injure a person, or push them into terrain traps such as trees, rocks, cliffs, gullies, creeks, or deeper debris.
Slab avalanches start when a cohesive layer of snow breaks free along a fracture line, often a stretch tens or hundreds of feet wide, and the entire slab slides as a unit. Avalanche.org’s slab release entry describes the sequence as failure initiation in a buried weak layer, crack propagation across the slope, and tensile failure at the boundaries of the slab as it begins to move downhill. Slab avalanches are responsible for most fatal accidents.
What triggers them
Most slab avalanches need a trigger. The trigger is sometimes natural: heavy snowfall that overloads a buried weak layer, wind that deposits snow rapidly on a leeward slope, or warming that destabilizes the snowpack from below. More often, in the accidents that hurt people, the trigger is the weight of a skier, snowboarder, snowmobiler, or hiker on or above the slab.
The signs that a snowpack is in a state where a trigger can release a slab are called red flags. The National Avalanche Center lists six:
- Recent avalanches in the area, which indicate the snowpack is unstable.
- Signs of unstable snow underfoot, including cracking, collapsing, and the hollow “whumpf” sound that means a buried weak layer has just fractured under your weight.
- Significant snowfall or rain, which can leave the snowpack unstable for several days.
- Wind-loaded slopes, especially on the leeward side of ridges where snow accumulates fastest. Cornices and drifts on steep slopes are visible markers.
- Rapid warming from rain, strong solar radiation, or extended above-freezing temperatures.
- Persistent weak layers reported in the current forecast, which can hold the potential for slab release for weeks after the initial storm.
Any of these red flags should prompt reassessment and more conservative terrain choices. The harder problem is that the absence of red flags is not proof a slope is safe. Some avalanche problems, persistent and deep persistent slabs in particular, give little or no surface feedback before they release. Avalanche.org notes that direct feedback from these problems is rare, and that tracks on a slope are not an indicator of stability. Persistent and deep persistent slabs can sometimes be triggered remotely from below, above, or beside a steep slope, including from lower-angle terrain that does not itself look steep enough to slide. A persistent weak layer buried in the snowpack can stay triggerable for weeks or months after the storm that formed it, which is one reason the daily forecast matters even when the surface looks settled and other parties have already skied the slope.
Where they happen
Avalanches happen on slopes steep enough to slide. The National Avalanche Center notes that slab avalanches are possible on any slope steeper than 30 degrees, with the majority of avalanche activity occurring on slopes between 35 and 50 degrees. The 35-to-40-degree band is also where many of the most appealing ski lines are found, which is part of what makes backcountry skiing hazardous when conditions align.
Slope angle is the dominant factor in whether a slope can slide, but two related concepts affect the consequences.
Connected terrain. A slope that’s only 25 degrees underfoot can still bury you if a steeper slope above releases and runs onto it. Looking up the slope, not just at it, is part of any terrain assessment.
Terrain traps. The National Avalanche Center uses the term for features that make a small avalanche worse: gullies that funnel snow into deeper deposits, cliffs that turn a tumble into a fall, dense trees that produce collision injuries, flat transitions and creeks and lakes where debris piles up the deepest. A slide that wouldn’t be fatal on open terrain can become so when a terrain trap sits below.
Lift-access backcountry. Terrain outside a ski area boundary is uncontrolled backcountry, even when a gate, a lift, or another party’s tracks make it look sanctioned. Avalanche.org is explicit that ski patrol avalanche mitigation stops at the boundary: on the other side the snowpack is unmitigated, and proximity to the lifts, visible tracks, or an easy return route does not make a slope safe. Sidecountry earns the same forecast, the same rescue gear, and the same one-at-a-time travel as any other backcountry.
The parts of an avalanche path
An avalanche path has three sections, and naming them helps you read terrain. The start zone is where the slab releases, generally on slopes steeper than about 30 degrees. The track is the middle, where the avalanche flows and accelerates downhill, guided by the shape of the terrain. The runout zone is where the slope eases and the avalanche finally comes to rest, and it is where the debris piles deepest. The runout is the most dangerous place to be standing or to stop: it collects the most snow, and avalanche debris sets hard and dense almost as soon as it stops, so a person caught there can be buried deep and set in place within seconds.
Get the forecast
In the United States, a network of regional centers publishes avalanche forecasts through the winter. During their operating seasons, many centers publish daily or regular forecasts, though coverage areas and frequency vary by center and region. The major centers include the Colorado Avalanche Information Center, the Northwest Avalanche Center for Washington and Oregon, the Sierra Avalanche Center for the Tahoe and northern Sierra region (other California ranges fall under other centers), and the Bridger-Teton Avalanche Center for the Tetons, with additional centers serving Utah, Montana, Idaho, Alaska, and other states. Find the center responsible for your area in the US avalanche center directory at avalanche.org.
A typical forecast gives the day’s danger level across the relevant elevations and aspects, names the avalanche problems forecasters expect, and rates each problem’s likelihood and size. The North American Public Avalanche Danger Scale runs from Low (level 1) to Extreme (level 5), and the lower ratings are easy to misread. At Moderate (level 2), natural avalanches are unlikely but human-triggered avalanches are possible, so features of concern have to be identified and the terrain and snow evaluated carefully (Avalanche.org). Even at Low (level 1), conditions are described as generally safe, but avalanches can still be triggered on isolated features and in extreme terrain. A danger rating is a regional summary, not a slope-by-slope guarantee. It is the starting point; the full forecast discussion, the problems, aspects, elevations, likelihood, and expected size, is what informs terrain choice.
Reading the forecast is a different skill than understanding it. Forecasts use specific vocabulary for the problem types in play (storm slab, persistent slab, wind slab, deep persistent slab, wet slab, glide) and for the elevation bands and aspects where each problem is most likely. Avalanche.org and most regional centers publish tutorials explaining how to read the forecasts they produce. The forecast is the single most useful habit in avalanche safety. It’s also free.
Get the gear
The National Avalanche Center’s guidance: every member of every party should always carry an avalanche transceiver (sometimes called a beacon), an avalanche probe, and an avalanche shovel, and know how to use them. The three work together in companion rescue: the transceiver locates the buried victim’s signal, the probe pinpoints exact location and depth, and the shovel digs the victim out. NAC notes that the average avalanche burial depth is four feet, and that avalanche debris sets hard and dense, sometimes to the point of being difficult to penetrate with a metal blade. The work is heavy and the window is short.
A transceiver alone is not a companion-rescue system. The signal search has to be followed by probing to pinpoint depth and by shoveling to extract the victim. Companion rescue depends on every member of the party carrying all three and on every member knowing how to use them under stress.
Beyond the triad, the National Avalanche Center recommends considering an inflatable avalanche airbag pack. According to NAC, an airbag, when properly deployed, can increase the chances of staying near the surface of an avalanche. The caveats matter. An airbag has to be deployed at the moment of being caught, it offers no help if it fails to deploy or the victim is overrun by a slide from above, and it cannot prevent trauma in a terrain trap. It reduces the odds of a deep burial; it does not guarantee survival.
Two things are sometimes mistaken for companion-rescue gear. A RECCO reflector, built into much winter clothing, is not a substitute for a transceiver. Avalanche.org is explicit that transceivers are the only suitable searching system for companion rescue, while RECCO detectors are carried by ski patrols and professional rescuers, not by the partners standing next to you. And a communication device is worth carrying to call in help once a rescue is already underway: a cell phone where there is service, a satellite messenger or personal locator beacon (PLB) where there is not.
A few details make the kit more dependable. Use a real avalanche shovel with a metal blade, because plastic shovels can break in dense avalanche debris, and digging is often the slowest and most physical part of any rescue. A helmet is worth carrying for skiers, snowboarders, snowmobilers, and mountaineers, because trauma accounts for a significant share of avalanche deaths.
Keep other electronics away from your transceiver, since phones, radios, cameras, GPS units, heated gloves, and metal objects can interfere with how a beacon transmits and searches. The beacon manufacturers’ shared guidance is to keep other electronics at least 20 cm from a transceiver in transmit mode and at least 50 cm away when you are searching.
Equipment that doesn’t get practiced doesn’t get used well in the field. Companion rescue is a time-pressured task carried out under emotional stress, often by people who have never before searched a real burial. The skills decay without practice. Run transceiver searches, burial drills, and fast shoveling in heavy snow during the off-season, because the day you need them is not the day to learn them. The point of the practice is that survival after burial depends on how quickly partners can complete the search, the probe, and the dig, and none of that gets faster the first time the gear comes out of the pack.
Get the training
The American Avalanche Association recognizes a course progression for recreationists, taught by A3-recognized course providers across the major snowpack regions. The progression looks like this:
Avalanche Awareness. A brief introduction to avalanches as a phenomenon, where they happen, and how to begin recognizing terrain. Useful for aspiring backcountry travelers who haven’t yet committed.
Level 1 Avalanche. A three-day course (approximately 24 hours of instruction split between classroom and field) covering hazard assessment, decision-making frameworks, and rescue basics. The American Avalanche Association describes this as “a cornerstone course for any person who travels in snowy mountainous terrain.” It’s the foundation. Anyone planning to ski, snowboard, snowmobile, or hike in winter backcountry should treat this as the entry standard. Prerequisites: none.
Avalanche Rescue. A one-day course (approximately eight hours) devoted entirely to companion rescue technique. The American Avalanche Association lists this alongside Level 1 as one of the two foundational recreational courses. It exists as a standalone course because the techniques are perishable and rescue practice benefits from refresher sessions every season or two. Prerequisites: none, though it pairs well with Level 1.
Level 2 Avalanche. A multi-day advanced course for travelers continuing into more complex terrain. The prerequisites are real: AIARE, for example, requires both Avalanche Rescue and AIARE 1 beforehand, and recommends at least a full season of backcountry experience between AIARE 1 and AIARE 2. It builds on the foundation with deeper snowpack analysis and terrain-choice frameworks.
AIARE, the American Institute for Avalanche Research and Education, develops avalanche curriculum and disseminates it through a provider network of more than 100 providers across 13 states (AIARE). Other A3-recognized providers operate regionally with their own curricula. The course calendar at avalanche.org lists upcoming offerings searchable by state and date. Course pricing varies by provider, region, and course length.
Online learning, including the avalanche.org tutorial and the Know Before You Go introductory video produced by the Utah Avalanche Center, is useful as a starting point and as ongoing review. It doesn’t substitute for field instruction in a recognized course. The decisions that get people killed are decisions made on a slope in real conditions, which is the thing that classroom-only learning cannot replicate.
Travel safely in the terrain
Once you are out, how the group moves through avalanche terrain is its own skill, built on a few habits the National Avalanche Center and Avalanche.org teach directly.
Expose one person at a time. Never put more than one person on an avalanche-prone slope at once. Exposing only one person at a time leaves the rest of the group available to rescue. Multiple burials are far harder, slower, and much less forgiving.
Regroup where you are not exposed. Stop and regroup in safe spots out of the path of any slope above you, not mid-slope and not in the runout below one. Avalanche debris funnels into gullies, depressions, and the flats at the bottom, so those are the places not to stand.
Do not stop below steep slopes, gullies, cornices, or other overhead hazards. What is above you matters as much as what is underfoot.
Treat tracks and crossings as no evidence at all. Existing ski tracks, good visibility, or another group crossing ahead of you do not prove a slope is stable. Avalanche.org is explicit that tracks on a slope are not an indicator of stability, especially with persistent slab problems that give little feedback before they fail.
Default to lower-angle terrain that is not connected to anything steeper above when the forecast or the conditions warrant it.
Avalanche.org calls communication with your partners the key to good decision-making, and that includes the standing rule that anyone in the group can call for a more conservative route or turn the group around, with no justification required.
Human factors
The snowpack is only half the problem. The other half is the set of mental shortcuts that lead trained, capable people onto slopes they would otherwise avoid. Avalanche.org catalogs these under human factors, and Ian McCammon’s FACETS framework names six common traps: familiarity, acceptance, consistency or commitment, expert halo, tracks or scarcity, and social facilitation. In practice they look like taking more risk on terrain you know well, seeking the group’s approval, sticking to a plan after investing in it, deferring to a confident leader, racing another party for first tracks, and a group emboldening itself into a decision no individual would make alone.
The throughline is that the riskiest decisions are often made before anyone is standing under the slope, in the momentum of a plan nobody wants to be the one to question. The countermeasure is structural, not heroic: decide your terrain in advance, name your no-go slopes and turnaround points before you leave, and give every member of the group genuine veto authority over the route. A plan that anyone can halt is much harder for a heuristic to override.
If you’re caught
The National Avalanche Center’s protocol for what to do if you’re caught:
- Deploy your airbag if you’re wearing one. Deployment must happen at the moment of being caught. An airbag deployed late or not at all has no effect.
- Get off the slab and out of the slide if you can. Try to fight to the side or off the moving snow.
- Fight to keep your head above the surface as the slide moves. Swimming motions help, and so does fighting upward against the moving snow.
- Get your hands to your face as the slide slows. This creates an air pocket before the snow sets. Once the slide stops moving, the snow sets hard within seconds, and a small air pocket made at that moment can be the difference between asphyxia and survival.
- Remain calm. Trained partners can begin rescue immediately. Movement consumes oxygen at a rate buried victims can’t afford, and panic burns minutes you don’t have.
None of these steps matters if your partners aren’t trained, aren’t carrying their own beacons, probes, and shovels, and haven’t practiced using them. Avalanche safety is a system, not a procedure.
If you end up buried
If the snow stops with you under it, the moment the slide slows is your one chance to make space: get a hand to your face and push out a pocket of air before the snow sets. After that, stay still and stay calm. Avalanche debris sets like concrete, so most buried victims cannot move or dig themselves out, and struggling only burns the air in that pocket faster. Survival now depends on trained partners reaching you quickly, which is the whole reason the group carries rescue gear and practices with it.
If your partner is caught
The protocol for the witnessing party, drawn from the National Avalanche Center and standard companion-rescue training (AIARE, Avalanche.org):
- Watch the victim and mark the last seen point. Track where the victim is when the snow stops moving; that point anchors the search. If several people can mark it from different angles, the search area narrows.
- Check the scene for further hazard. The slope above may still be loaded, and the conditions that produced the first avalanche have not changed. Some of the most preventable secondary fatalities in avalanche history happened to rescuers who walked into the runout while the slope above could still release. Do not become the second burial.
- Account for who is missing. A quick head count tells the group how many people to search for and prevents wasted effort looking for someone who is already safe.
- Switch every rescuer’s transceiver to search. Transceivers transmit by default, so everyone searching has to switch to receive (search) mode, and the group has to confirm no unit is still transmitting into the search area.
- Search, scanning for surface clues as you go. Move below the last seen point running the transceiver search, and watch the surface: a glove, a ski, a pole, a pack, or a hand on the snow is a direct clue and can be faster than the electronics.
- Probe to pinpoint. Once the transceiver search closes in, probe systematically to find the victim’s exact location and depth before digging.
- Shovel strategically. Avalanche debris sets like concrete, so start downhill of the probe (about one step for a shallow burial, two for a deeper one) and dig in toward the airway, clearing a platform rather than a vertical hole. This reaches the airway faster and spends less of the rescuers’ energy.
- Treat for trauma and hypothermia within the limits of your training once the victim is uncovered. Both are concerns after a burial.
Do not delay companion rescue to wait for professional help. Most buried victims have less than 15 minutes before asphyxiation becomes the danger (Avalanche.org), and a helicopter or ski-patrol team almost never arrives inside that window. Call 911 or send an SOS as soon as someone can be spared, but the partners on scene, with their transceivers, probes, and shovels and the practice to use them fast, are the rescue. Be prepared to spend the night out afterward, rescued or not: the party is now far from where the day started, with daylight running and conditions that may have changed the route home.
If an avalanche catches your vehicle
Avalanches also cross highways, and a vehicle is one of the few situations where the standard advice is to stay put. Do not drive around avalanche-control closures, gates, or warning signs. Department of Transportation guidance for a road avalanche, including from the Colorado DOT, is to stay in the vehicle, keep the windows up, and turn the engine off so that carbon monoxide cannot build up if the tailpipe is buried. Call for help and wait. Do not get out to walk for it, because a parallel path above the road may still release onto you. The vehicle is a shelter; leaving it usually trades a protected space for open exposure.
What this guide is, and what it is not
This guide is general education. It cannot evaluate the conditions on the day you go out, and it cannot assess a specific route, group, or slope. Avalanche forecasts are regional summaries, not slope-by-slope guarantees, and no article can substitute for the current forecast from the center responsible for your area. Backcountry travel in avalanche terrain can result in serious injury or death even for people who carry every piece of gear and have taken every course. Nothing here removes that risk.
Risk gets reduced before the trip, not on it: the forecast, the training, rehearsed rescue, conservative terrain. The slope you skip is always safer than the one you misjudge.
Resources
US national resources
- Avalanche.org. Federated portal for US avalanche forecasts, education, tutorial, encyclopedia, and course calendar. Run by the American Avalanche Association and US Forest Service National Avalanche Center.
- American Avalanche Association (A3). Professional body that recognizes course providers and publishes guidelines.
- US Forest Service National Avalanche Center. Federal coordinating body for US avalanche centers.
Regional avalanche centers (selected)
- Colorado Avalanche Information Center. Colorado, plus the central US accident database for the country.
- Northwest Avalanche Center. Pacific Northwest forecast zones in Washington and Oregon.
- Sierra Avalanche Center. Tahoe / central-northern Sierra forecast area.
- Eastern Sierra Avalanche Center. Eastern Sierra / Mammoth-area forecast area.
- Mount Shasta Avalanche Center. Mount Shasta region.
- Bridger-Teton Avalanche Center. Teton-region forecast zones.
- Utah Avalanche Center. Utah.
- Find all US avalanche centers via the Avalanche.org directory.
Education
- Avalanche.org course calendar. Searchable by state and date.
- AIARE. Major US course provider, recreation and professional tracks.
- Avalanche.org Tutorial. Free online introduction.
- Know Before You Go. Utah Avalanche Center introductory video.
- Avalanche.org Encyclopedia. Definitions of terminology used in forecasts and courses.
This guide reflects current US recreational avalanche safety practice as of June 2026. Avalanche conditions, course providers, and best practices evolve. Always defer to the regional avalanche center responsible for your area, and to your own trained judgment, over any general guide.
If you find an error in this guide, please email corrections@slopehound.com.